
Showing posts with label Miniatures. Show all posts
Showing posts with label Miniatures. Show all posts
Sunday, May 31, 2015
Mad Max: Fury Road

Friday, February 10, 2012
The Fellowship - 1
These are plastic 25mm miniatures from Games Workshop's Lord of the Rings line. They are the Fellowship models from the Mines of Moria boxed set which was released in 2005.

These are pre-owned models that I won on eBay a couple of years ago. I've stripped them of their previous paint jobs and cleaned off any excess mold lines that were still remaining. I've also washed them and glued on a base of sand. The next step will be to spray paint them with an undercoat of black paint.

These are pre-owned models that I won on eBay a couple of years ago. I've stripped them of their previous paint jobs and cleaned off any excess mold lines that were still remaining. I've also washed them and glued on a base of sand. The next step will be to spray paint them with an undercoat of black paint.
Friday, January 27, 2012
Warriors of Rohan - 1
It's been over 10 months since I did any work on my miniature wargame hobby. Back in March 2010 I stripped the paint off 13 Warriors of Rohan I'd won on eBay. Today was a planned day off work so I bought a new CFL bulb for my desk lamp and started preparing the miniatures for painting.

These are plastic miniatures and are 25mm scale. After washing them in soapy water and drying them off I pulled out my trusty craft blade and cleaned off any flash I could see. I then did some minor conversions. One of the spearmen had a broken spear so I removed the remaining shaft, cut off and repositioned his right arm, inserted an axe I'd made earlier, removed his shield, and in his left hand inserted a metal wire to be used as a banner pole. The other conversion I did was to remove the plastic arrow from one of the archers and replace it with a thin piece of wire.
After that I dabbled some PVA glue on the surface of the bases and sprinkled some sand/gravel over the top. I'll leave the miniatures to dry overnight and the next step will be to undercoat them with spray paint.
I find this part of the hobby relaxing and it was all the more enjoyable while listening to the Lord of the Rings movie soundtracks.
Tuesday, August 31, 2010
Mammoth Steaks & Bronto Burgers
It was many years ago that I first became aware of Tusk, a set of miniature rules written by Matthew Hartley. It was the tag line 'Mammoth Hunting from 12,000 BC to 1914 AD' that caught my eye and made me want to learn more about these rules that were designed to portray prehistoric hunts. I was intrigued. I mean how cool would it be to have a group of cavemen hunt mammoth?
Then back in June this year I came across a review of Tusk on The Ooh Shiny Complex blog. This again got me interested and I was excited to learn that the rules also included Victorian hunters and dinosaurs.

Well, just today I saw a post on Tim's Wargaming Stuff blog where he talks about using the rules for a Star Wars-themed hunting party of Tusken Raiders. He even included a link to the rules at Wargame Vault where you can download the pdf version of the rules for US$4.95.
I'd felt I'd put off purchasing these rules for too long and the little voice inside my head was telling me that I hadn't purchased much gaming material this year. So I made a quick trip to Wargame Vault, input my credit card details and downloaded the rules.
Here's the blurb on the rules:
Tusk is the widely acclaimed set of Mammoth hunting rules written by Matthew (Aeronef, Scudbusters) Hartley.
Tusk includes rules for cavemen hunting mammoths using stone age weapons, fire, dogs and also heroes called Og! The mammoths are controlled by a reaction table so Tusk makes for an excellent solo game as well as one played by two or more players (whether in competition to get the mammoths or in co-operation).
Beyond mammoths, Tusk also includes rules for pre-historic beasts to allow you to recreate Hollywood-esque cavemen versus dinosaur battles.
Additional rules allow you to include Victorian adventurers who discover beasts from forgotten ages on distant plateau in South America or Central Asia.
I'm sure I've got some plastic mammoth and dinosaur models around here somewhere...
Then back in June this year I came across a review of Tusk on The Ooh Shiny Complex blog. This again got me interested and I was excited to learn that the rules also included Victorian hunters and dinosaurs.

Well, just today I saw a post on Tim's Wargaming Stuff blog where he talks about using the rules for a Star Wars-themed hunting party of Tusken Raiders. He even included a link to the rules at Wargame Vault where you can download the pdf version of the rules for US$4.95.
I'd felt I'd put off purchasing these rules for too long and the little voice inside my head was telling me that I hadn't purchased much gaming material this year. So I made a quick trip to Wargame Vault, input my credit card details and downloaded the rules.
Here's the blurb on the rules:
Tusk is the widely acclaimed set of Mammoth hunting rules written by Matthew (Aeronef, Scudbusters) Hartley.
Tusk includes rules for cavemen hunting mammoths using stone age weapons, fire, dogs and also heroes called Og! The mammoths are controlled by a reaction table so Tusk makes for an excellent solo game as well as one played by two or more players (whether in competition to get the mammoths or in co-operation).
Beyond mammoths, Tusk also includes rules for pre-historic beasts to allow you to recreate Hollywood-esque cavemen versus dinosaur battles.
Additional rules allow you to include Victorian adventurers who discover beasts from forgotten ages on distant plateau in South America or Central Asia.
I'm sure I've got some plastic mammoth and dinosaur models around here somewhere...
Tuesday, August 17, 2010
Hordes of the Things rules available for free download
Hordes of the Things is a set of fast play fantasy miniature wargame rules designed by Phil Barker, Sue Laflin Barker and Richard Bodley Scott. These rules are based on the concepts of the popular De Bellis Antiquitatis (usually known as DBA) rule set.
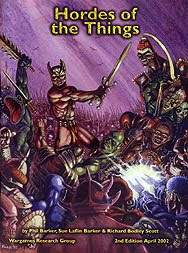
On his website Phil Barker has made the HOTT rules available for free download. He writes:
Some time in 2009, these rules went out-of-print and the copyright reverted to the three authors. They are now unavailable from any supplier I have been able to find. I have consulted Phil and Richard and we are agreed that until it is possible to publish a new edition of HOTT, we will make it available at this website. Anyone who wishes to play HOTT, has our permission to download a single copy of HOTT version 2 for his/her personal use. (Also page 23, sorry for the omission. I'll redo the whole thing soon. )
The rules are available via the links above or go to Phil's site and click on the History of W.R.G. link at the top of the page. The HOTT rules are about half-way down the page. Don't forget to download the separate page 23.
I already own a published set of these rules and have a few Lord of the Rings-inspired 15mm armies in various stages of completion. This is a rules set that I've read and admire and I intend on playing in the future. I don't know when I'll get around to playing but it's definitely on my 'to do' list.
Check them out.

On his website Phil Barker has made the HOTT rules available for free download. He writes:
Some time in 2009, these rules went out-of-print and the copyright reverted to the three authors. They are now unavailable from any supplier I have been able to find. I have consulted Phil and Richard and we are agreed that until it is possible to publish a new edition of HOTT, we will make it available at this website. Anyone who wishes to play HOTT, has our permission to download a single copy of HOTT version 2 for his/her personal use. (Also page 23, sorry for the omission. I'll redo the whole thing soon. )
The rules are available via the links above or go to Phil's site and click on the History of W.R.G. link at the top of the page. The HOTT rules are about half-way down the page. Don't forget to download the separate page 23.
I already own a published set of these rules and have a few Lord of the Rings-inspired 15mm armies in various stages of completion. This is a rules set that I've read and admire and I intend on playing in the future. I don't know when I'll get around to playing but it's definitely on my 'to do' list.
Check them out.
Friday, May 14, 2010
Mantic Ghouls
Mantic Games and Wayland Games recently had a promotion for Mantic Games' latest range of plastic 25mm Ghouls. I received my free sprue of two ghouls in the mail today. They look quite detailed and you have the option of a couple of menacing poses and different heads.

Here is a picture of what they look like when assembled.

Here is a picture of what they look like when assembled.

Monday, March 22, 2010
Simple Green plastic test results
Last week I placed thirteen plastic Warriors of Rohan from Games Workshop's Lord of the Rings line of 25mm miniatures into a small glass jar and filled it with just enough Simple Green All-Purpose Cleaner so that they were covered. The purpose of this was to see how good the product was at stripping paint from plastic miniatures. Here's a photo of the miniatures prior to getting the Simple Green treatment.

With a little gentle scrubbing from an old toothbrush I would estimate that a good 95% of the paint was removed. Here's a photo of the miniatures after the scrubbing.

One thing I was aware of is that the plastic miniatures are more fragile than their metal counterparts. The LOTR range in particular are modelled quite realistically and this means thinner weapons than normal Games Workshop 'heroic scale' 28mm miniatures. Because of this I tried hard not to be too rough with the toothbrush. Even so, I did manage to break off half of a spear. Ah well, that can be easily repaired.
Overall, I'm very happy with the Simple Green results. It's also safer and nicer smelling than other types of products that can be used to strip paint. I'll definitely be using this product for all future miniature paint-stripping projects.

With a little gentle scrubbing from an old toothbrush I would estimate that a good 95% of the paint was removed. Here's a photo of the miniatures after the scrubbing.

One thing I was aware of is that the plastic miniatures are more fragile than their metal counterparts. The LOTR range in particular are modelled quite realistically and this means thinner weapons than normal Games Workshop 'heroic scale' 28mm miniatures. Because of this I tried hard not to be too rough with the toothbrush. Even so, I did manage to break off half of a spear. Ah well, that can be easily repaired.
Overall, I'm very happy with the Simple Green results. It's also safer and nicer smelling than other types of products that can be used to strip paint. I'll definitely be using this product for all future miniature paint-stripping projects.
Monday, March 15, 2010
Simple Green plastic test
I'd already established that Simple Green All-Purpose Cleaner worked wonders stripping the paint from metal miniatures. Now it was time to see how it worked on plastic. For this test I chose thirteen Rohan warriors I'd picked up on eBay in a LOTR miniatures lot last year.

These are the only Rohan warriors I own and I'd like to get them painted for some skirmish gaming. It's just that the paint jobs from their previous owner sucks. Into the Simple Green they go!

This photograph reminds me of the Dead Marshes scene from Peter Jackson's Lord of the Rings films.
'Who are they? What are they?' asked Sam shuddering, turning to Frodo, who was now behind him.
'I don't know,' said Frodo in a dreamlike voice. 'But I have seen them too. In the pools when the candles were lit. They lie in all the pools, pale faces, deep under the dark water. 'I saw them: grim faces and evil, and noble faces and sad. Many faces proud and fair, and weeds in their silver hair. But all foul, all rotting, all dead. A fell light is in them." - The Two Towers 'The Passage of the Marshes' - J.R.R. Tolkien

These are the only Rohan warriors I own and I'd like to get them painted for some skirmish gaming. It's just that the paint jobs from their previous owner sucks. Into the Simple Green they go!

This photograph reminds me of the Dead Marshes scene from Peter Jackson's Lord of the Rings films.
'Who are they? What are they?' asked Sam shuddering, turning to Frodo, who was now behind him.
'I don't know,' said Frodo in a dreamlike voice. 'But I have seen them too. In the pools when the candles were lit. They lie in all the pools, pale faces, deep under the dark water. 'I saw them: grim faces and evil, and noble faces and sad. Many faces proud and fair, and weeds in their silver hair. But all foul, all rotting, all dead. A fell light is in them." - The Two Towers 'The Passage of the Marshes' - J.R.R. Tolkien
Sunday, March 14, 2010
Simple Green success
Last week I decided to test the merits of Simple Green All-Purpose Cleaner as a solution to the problem of stripping paint from my miniatures. So I placed a couple of metal Mordor Orc Captains from Games Workshop's Lord of the Rings line of 25mm miniatures into a small glass jar and filled it with just enough Simple Green so that they were covered.
Well, six days later and I've now taken them out. I was a little disappointed to see that they looked exactly the same as when I'd put them into the liquid. So I grabbed an old toothbrush and one of the miniatures and started scrubbing under some running water. Then I got excited. The paint just sloughed off very easily. Even the paint in the various nooks and crannies of the figure came out without much trouble.
I've used oven-cleaner and brake fluid in the past to strip paint from miniatures with varying degrees of success. What I didn't like about those products was their hazardous nature. Simple Green is non-toxic and biodegradable. It also smells nice and leaves the figures feeling clean. To top it off it didn't affect either the metal or the plastic bases. I'm now hooked!
Check out the results for yourself.


The only reason I had these miniatures soaking for six days was today was the first opportunity to clean them. My next test will be to see if Simple Green is as effective with stripping paint from plastic miniatures as it is with metal. I'll also do some test runs on shorter periods of immersion and report back.
Well, six days later and I've now taken them out. I was a little disappointed to see that they looked exactly the same as when I'd put them into the liquid. So I grabbed an old toothbrush and one of the miniatures and started scrubbing under some running water. Then I got excited. The paint just sloughed off very easily. Even the paint in the various nooks and crannies of the figure came out without much trouble.
I've used oven-cleaner and brake fluid in the past to strip paint from miniatures with varying degrees of success. What I didn't like about those products was their hazardous nature. Simple Green is non-toxic and biodegradable. It also smells nice and leaves the figures feeling clean. To top it off it didn't affect either the metal or the plastic bases. I'm now hooked!
Check out the results for yourself.


The only reason I had these miniatures soaking for six days was today was the first opportunity to clean them. My next test will be to see if Simple Green is as effective with stripping paint from plastic miniatures as it is with metal. I'll also do some test runs on shorter periods of immersion and report back.
Monday, March 08, 2010
Simple Green test
Just over a week ago I bought some Simple Green All-Purpose Cleaner to see if it was suitable as a paint stripper for both plastic and metal miniatures. As the first test subjects I chose a couple of metal Mordor Orc Captains from the Mordor Orc Command set from Games Workshop's Lord of the Rings line of 25mm miniatures.

I picked up these Orc Captains through some miniature lots I won on eBay last year. Although I only have two, luckily they are different versions of the same style of figure. I'm not happy with the paint jobs from their original owners, however having said that, these two are painted better then the majority of miniatures I purchase on eBay.

I think these guys are painted in acrylic paint, as opposed to enamel paint. I'm not sure what glue was used for the basing material. No matter, into the Simple Green they go!

So this morning I dropped them into a glass jar (an ex-salsa jar...mmm...salsa) with the liquid just covering them. I screwed the lid on so there would be no chance of spillage and placed it into a high, out-of-the-way place so the kids wouldn't find it.
I'll report back shortly on the outcome.

I picked up these Orc Captains through some miniature lots I won on eBay last year. Although I only have two, luckily they are different versions of the same style of figure. I'm not happy with the paint jobs from their original owners, however having said that, these two are painted better then the majority of miniatures I purchase on eBay.

I think these guys are painted in acrylic paint, as opposed to enamel paint. I'm not sure what glue was used for the basing material. No matter, into the Simple Green they go!

So this morning I dropped them into a glass jar (an ex-salsa jar...mmm...salsa) with the liquid just covering them. I screwed the lid on so there would be no chance of spillage and placed it into a high, out-of-the-way place so the kids wouldn't find it.
I'll report back shortly on the outcome.
Thursday, March 04, 2010
Game magazines at the library
Although I don't play Warhammer Fantasy Battle or Warhammer 40K, I do collect Games Workshop's Lord of the Rings range of miniatures so I find White Dwarf an interesting magazine to browse through. I like the painting and terrain articles and anything in relation to the Lord of the Rings Strategy Battle Game or War of the Ring.

Most libraries in Brisbane have a range of White Dwarf magazines available for borrowing and I recently got out a bunch to read. The magazines are also full of inspirational photographs of very well painted miniatures.

Most libraries in Brisbane have a range of White Dwarf magazines available for borrowing and I recently got out a bunch to read. The magazines are also full of inspirational photographs of very well painted miniatures.
Sunday, February 28, 2010
A good stripper is hard to find...
...a good paint stripper that is.
I've been searching for a good paint stripper that won't harm either plastic or metal miniatures. The word on the Internet is that Simple Green all-purpose cleaner is one of the best. The best thing is that it's also non-toxic and biodegradable.
I've looked in my local supermarkets and hardware stores over the last few months but couldn't find it. I then found a thread on a miniature painting forum that explained it could only be found in Australia at mega-hardware store Bunnings Warehouse. So a quick trip to my local Bunnings store this afternoon and I found it in the cleaning products aisle.

AU$9.47 for a 650ml (22 fl oz) bottle. I'm keen to see if it works as good as it is supposed to. I'll report back in a week or two.
I've been searching for a good paint stripper that won't harm either plastic or metal miniatures. The word on the Internet is that Simple Green all-purpose cleaner is one of the best. The best thing is that it's also non-toxic and biodegradable.
I've looked in my local supermarkets and hardware stores over the last few months but couldn't find it. I then found a thread on a miniature painting forum that explained it could only be found in Australia at mega-hardware store Bunnings Warehouse. So a quick trip to my local Bunnings store this afternoon and I found it in the cleaning products aisle.

AU$9.47 for a 650ml (22 fl oz) bottle. I'm keen to see if it works as good as it is supposed to. I'll report back in a week or two.
Thursday, February 25, 2010
Orcs from Mordor!
This evening I finished my latest painting project of 24 Mordor Orcs from Games Workshop's Lord of the Rings line of miniatures. These plastic figures are 25mm in scale and were painted with Citadel acrylic paints. All figures were purchased second-hand, mainly from eBay. I stripped all pre-existing paint from these miniatures and started again from scratch. I painted them using a production-line method. Click on the picture for a larger image.

There are eight with a hand weapon and shield, eight with bows and eight with two-handed weapons.
I now have some enemies for my warriors of Minas Tirith to battle. This will give me the opportunity to do solo testing of some miniatures rules such as Lord of the Rings - Strategy Battle Game and Song of Blades and Heroes.

There are eight with a hand weapon and shield, eight with bows and eight with two-handed weapons.
I now have some enemies for my warriors of Minas Tirith to battle. This will give me the opportunity to do solo testing of some miniatures rules such as Lord of the Rings - Strategy Battle Game and Song of Blades and Heroes.
Saturday, January 30, 2010
Call forth the Host of Gondor!
Today I finally finished a painting project of 88 Warriors of Minas Tirith from Games Workshop's Lord of the Rings line of miniatures. These figures are 25mm in scale and were painted with acrylic Games Workshop paints. All figures were purchased second-hand, mainly from eBay. I stripped all existing paint from these figures and started again from scratch. I painted them using a production-line method.

There are 28 Warriors of Minas Tirith with sword and shield, 28 with spear and shield, and 32 with bow.
To motivate myself while painting I listened to the 13-CD dramatised BBC production of LOTR, as well as the three soundtrack CD's from the recent films, and also at times had the three special extended DVD edition films playing on the computer next to me.
It was a massive undertaking but I am very satisfied with the result. I'll post further photos in the coming days.

There are 28 Warriors of Minas Tirith with sword and shield, 28 with spear and shield, and 32 with bow.
To motivate myself while painting I listened to the 13-CD dramatised BBC production of LOTR, as well as the three soundtrack CD's from the recent films, and also at times had the three special extended DVD edition films playing on the computer next to me.
It was a massive undertaking but I am very satisfied with the result. I'll post further photos in the coming days.
Thursday, January 21, 2010
Can I paint your models, Dad?
"Can I paint your models, Dad?" Maddie asked.
"How about you start off painting some bases for me." I suggested.

She painted nine bases before she'd had enough...
"How about you start off painting some bases for me." I suggested.

She painted nine bases before she'd had enough...
Monday, June 08, 2009
Blood Bowl HeroQuest Goblin Conversion - First Four
So I've recently got into the Blood Bowl board game. Now "got into" really only means downloading the Living Rulebook, reading the rules and scouring for more info every Blood Bowl related website, forum, image gallery, podcast and YouTube clip that I can find. I haven't yet played a game but I've read a lot on the various available teams and their tactics.
While my initial enthusiasm is so high I decided to have a go at creating a Blood Bowl team from scratch. Looking around at the spare miniatures I have lying around I came across some HeroQuest goblins. I've bought a number of second hand HeroQuest board games over the years and have a collection of miniatures from that game that have been damaged in some way. Most notably are the goblins which seem prone to having their weapons broken off.
This is what the goblins should look like.
 Some of my HeroQuest goblins still on the sprue
And this is my collection of damaged HeroQuest goblins.
 Weaponless HeroQuest goblins
I've been wondering for some time what to do with these little guys. What good are weaponless goblins? Well, what about Blood Bowl? I could create a goblin Blood Bowl team! Sure, the goblins are probably one of the suckiest Blood Bowl teams but they sure look like a lot of fun to play. The decision was made.
The first thing I did was to get some epoxy putty for converting the miniatures. The most famous type of modelling putty is Kneadatite which is also known as 'green stuff'. This is a type of putty that comes in blue and yellow strips and when mixed together forms a green-coloured putty with the consistency of sticky chewing gum. The beauty of this product is that after a few hours at room temperature it will dry rock hard. I didn't end up getting green stuff though. The easiest stuff for me to get at my local hobby store was Tamiya Epoxy Putty. This stuff comes in yellow and white strips and when mixed together turns a pale yellow colour.
The only modelling tool I used was my normal hobby knife with a scalpel-like blade. I used this knife for both cutting off the arms and also the sculpting of the putty.
The first step was to cut off the arms of the goblins and then use plastic cement to glue them back on at different angles. I then mixed small blobs of putty and used these to model shoulder pads and helmets. Here are some photos. All photos can be clicked on for a larger image.
 Goblin with knuckleduster
 Goblin with single spiked shoulder pad
 Goblin with double spiked shoulder pad
 Goblin flippin' the bird
Below are two of the goblins next to original goblin figures. This will give you a better idea of how the arms have been repositioned and see the putty conversions that have been added.

Here are the other two converted goblins next to a couple of original sculpts.

And here are the four boys next to a human and orc linemen from the 3rd edition Blood Bowl boxed set for comparison. I think the large goblin armour shoulder pads give them an amusing appearance.
 Size comparison with Blood Bowl figures
And finally I present the first four players of my goblin Blood Bowl team. This was my first time sculpting with epoxy putty and I found it to be a very enjoyable and satisfying experience. It took me on average about two hours per model. My plan is to create 16 goblin models (11 players plus reserves) with each model being a unique individual. After that I plan on sculpting a couple of troll players for the team and of course I mustn't forget the goblin bombadier, looney, fanatic and pogoer models.
 The first four goblin players for my goblin Blood Bowl team
While my initial enthusiasm is so high I decided to have a go at creating a Blood Bowl team from scratch. Looking around at the spare miniatures I have lying around I came across some HeroQuest goblins. I've bought a number of second hand HeroQuest board games over the years and have a collection of miniatures from that game that have been damaged in some way. Most notably are the goblins which seem prone to having their weapons broken off.
This is what the goblins should look like.
 Some of my HeroQuest goblins still on the sprue
And this is my collection of damaged HeroQuest goblins.
 Weaponless HeroQuest goblins
I've been wondering for some time what to do with these little guys. What good are weaponless goblins? Well, what about Blood Bowl? I could create a goblin Blood Bowl team! Sure, the goblins are probably one of the suckiest Blood Bowl teams but they sure look like a lot of fun to play. The decision was made.
The first thing I did was to get some epoxy putty for converting the miniatures. The most famous type of modelling putty is Kneadatite which is also known as 'green stuff'. This is a type of putty that comes in blue and yellow strips and when mixed together forms a green-coloured putty with the consistency of sticky chewing gum. The beauty of this product is that after a few hours at room temperature it will dry rock hard. I didn't end up getting green stuff though. The easiest stuff for me to get at my local hobby store was Tamiya Epoxy Putty. This stuff comes in yellow and white strips and when mixed together turns a pale yellow colour.
The only modelling tool I used was my normal hobby knife with a scalpel-like blade. I used this knife for both cutting off the arms and also the sculpting of the putty.
The first step was to cut off the arms of the goblins and then use plastic cement to glue them back on at different angles. I then mixed small blobs of putty and used these to model shoulder pads and helmets. Here are some photos. All photos can be clicked on for a larger image.
 Goblin with knuckleduster
 Goblin with single spiked shoulder pad
 Goblin with double spiked shoulder pad
 Goblin flippin' the bird
Below are two of the goblins next to original goblin figures. This will give you a better idea of how the arms have been repositioned and see the putty conversions that have been added.

Here are the other two converted goblins next to a couple of original sculpts.

And here are the four boys next to a human and orc linemen from the 3rd edition Blood Bowl boxed set for comparison. I think the large goblin armour shoulder pads give them an amusing appearance.
 Size comparison with Blood Bowl figures
 The first four goblin players for my goblin Blood Bowl team
Sunday, June 07, 2009
Blood Bowl

I've recently become interested in Games Workshop's Blood Bowl. I always find it interesting how I develop a new passion for a game. I often forget exactly how or when the initial spark of interest occurred. Often it will be through noticing an image or comment on BoardGameGeek or a blog. In the case with Blood Bowl it was listening to a podcast.
First up let me say that I've been aware of Blood Bowl pretty much from when it was first released back in 1987. I was a big Talisman fan around that time and read White Dwarf magazine for its role-playing articles (yep, back in the early days White Dwarf actually had non-GW related miniatures articles!). I saw the advertisements for Blood Bowl, but not being into Warhammer I wasn't that interested. Fantasy football with orcs, humans and elves? Pfft! I never gave it another thought.
Then back in June 2008 my wife picked up the 3rd Edition Blood Bowl boxed set at a school fete for $2. Sure, it was missing the rules and 4 human players (1 catcher, 1 linesman, 1 blitzer and 1 thrower if anyone has any spares!) but pretty much everything else was there. And it was only $2!
 The 3rd Edition Blood Bowl Boxed Set
The World's End Radio podcast is produced by a couple of Western Australian guys, Luke and JJ. They had an episode (episode #19 'Going for the Grope') devoted entirely to the Sand Groper Cup. The Sand Groper Cup is an annual WA Blood Bowl tournament and this year was attended by almost forty players.
Listening to this episode, with Luke and JJ's discussion around their team composition, tactics and strategy, the interviews with the tournament organisers, and interviews with some of the attendees, and how much fun these guys were having, it really made me reconsider my original opinion of Blood Bowl. So much so that I downloaded the latest free version of the Blood Bowl: Living Rulebook from the Games Workshop specialist games site and have been researching the game like crazy over the last few weeks.
What appeals to me about Blood Bowl is that the rules are free and you only need 11 miniatures for a team. That means it's a fairly cheap game to get into. There's also the almost roleplaying-like aspect of league play where you develop a fledgling team through a season of games, increasing individual player's abilities as you progress.
I've been pretty surprised at what appears to be a huge cult following of the Blood Bowl board game world wide. And coincidentally, a new Blood Bowl video game will shortly be released for the PC, Sony PSP, Nintendo DS and Xbox 360 platforms.
 An image from the computer game
The ratings and personal comments on BoardGameGeek give this game a glowing recommendation. I may just start painting up the teams from the boxed set and will look around at whatever other miniatures I have that I can use. Oh yeah, I even found a Blood Bowl league currently running in Brisbane.
Saturday, May 09, 2009
Moria Goblins - Part 6
After finishing the sand on top of the bases I then added a combination of flock and static grass with small dabs of PVA (white wood) glue. This glue dries clear so is invisible. After that it was just a matter of giving the base rims a couple of coats of slightly watered down Citadel Bestial Brown paint.
Finally a couple of coats of a matt spray varnish (I use a relatively cheap brand called Cyrstal Kote Matt from a dollar store) and voila! 48 Games Workshop Moria Goblins fully painted!

You can click in the pictures for a larger image.

Finally a couple of coats of a matt spray varnish (I use a relatively cheap brand called Cyrstal Kote Matt from a dollar store) and voila! 48 Games Workshop Moria Goblins fully painted!

You can click in the pictures for a larger image.

Moria Goblins - Part 5
The painting of the goblin models was now complete. The next step was to work on the base. To do this I first applied slightly watered down PVA (white wood) glue to the top of a base with an old paintbrush. Don't use one of your good brushes because your brush won't ever be the same afterwards. I use the same brush for this purpose every time I do miniature bases. I then dipped the base into a small plastic tub (in this case an old ice cream container) full of a mixture of fine sand, and some coarser sand and talus I bought from a model railway shop. I then left the models overnight so that the glue would have time to fully dry.
 Sand has been glued to the bases
After the glue was dry I then gave the top of the bases a coat of watered down Citadel Scorched Brown paint.
 Sand has been painted brown
The final effect for the sand was done with an old brush using the drybrush process to bring out the details with Citadel Bleached Bone paint. Once again, try to use a single brush specifically for drybrushing as it does cause damage to the hairs of the brush over time.
 A drybrush really brings out the details
 Sand has been glued to the bases
After the glue was dry I then gave the top of the bases a coat of watered down Citadel Scorched Brown paint.
 Sand has been painted brown
The final effect for the sand was done with an old brush using the drybrush process to bring out the details with Citadel Bleached Bone paint. Once again, try to use a single brush specifically for drybrushing as it does cause damage to the hairs of the brush over time.
 A drybrush really brings out the details
Saturday, April 18, 2009
Stripping Goblins
I've only tried to remove paint from miniatures once in the past. That was about seven years ago and it was a bunch of 1/72 HAT plastic Napoleonic miniatures. I used an oven cleaner to spray all over the figures and then left them to sit for a day or two. It worked reasonably well as a paint stripper but I had to be careful with the noxious fumes and also wear protective gloves and eye wear.
I've been reading on the Internet of the merits of brake fluid as a paint stripper that's safe to use with plastics. I decided to try it on a bunch of Moria Goblins I'd picked up really cheaply on eBay. These figures had paint jobs that left a lot to be desired and as I intended to repaint them, the original paintwork needed to be stripped.
 87 stripped goblins ready for a spray undercoat
I dumped 87 of the little blighters into a container and covered them with brake fluid. I then left them to soak overnight. 24 hours later I grabbed an old toothbrush and was pleasantly surprised to find the paint just sloughing off. The figures weren't harmed at all and the brake fluid combined with some scrubbing removed probably 95% of the previous paint job.
Some had broken weapons when I got them so they'll be used for conversion purposes.
I've been reading on the Internet of the merits of brake fluid as a paint stripper that's safe to use with plastics. I decided to try it on a bunch of Moria Goblins I'd picked up really cheaply on eBay. These figures had paint jobs that left a lot to be desired and as I intended to repaint them, the original paintwork needed to be stripped.
 87 stripped goblins ready for a spray undercoat
I dumped 87 of the little blighters into a container and covered them with brake fluid. I then left them to soak overnight. 24 hours later I grabbed an old toothbrush and was pleasantly surprised to find the paint just sloughing off. The figures weren't harmed at all and the brake fluid combined with some scrubbing removed probably 95% of the previous paint job.
Some had broken weapons when I got them so they'll be used for conversion purposes.
Subscribe to:
Posts (Atom)

